Access to certain features is controlled by security groups that either allow or restrict permissions. These guidelines will help you set up your security groups based on the initial configuration. If you need more groups, please contact us for help!
To add a new security group, click User Access > Security Groups > Add.

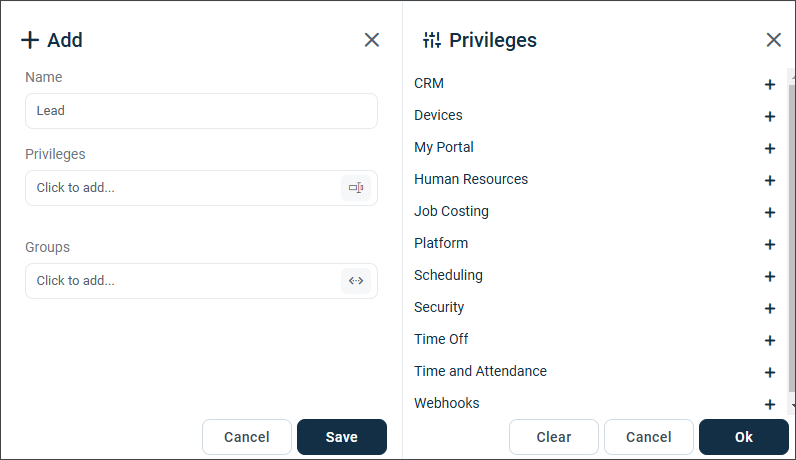
Enter the new category in the Name field. Select the applicable privileges and groups.
Click Ok > Save.
Important
Groups > Locations establishes criteria and limits the range of privileges to just the chosen locations. We highly advise selecting at least one location. If not, users will have access to everyone within the organization. You can refer to How to Add Locations for instructions.
To Edit a Security Group
If you wish to change the privileges of an existing security group, click the security group whose privileges you want to change, click Edit, and make the changes.
Follow the same instructions for adding a security group above.
You're done! 🙂
👏 If you have questions, please call us at (888) 783-1493, email [email protected], or Submit a Ticket.
FAQ
What steps should I follow to set up security groups?
To set up security groups, navigate to User Access > Security Groups, then add a new group by entering a name and selecting privileges.
What happens if I don't assign a location to a security group?
If no location is assigned, users will have access to everyone within the organization.
Can I restrict access to specific locations for a security group?
Yes, you can restrict access by selecting specific locations when creating or editing a security group.
What should I do if I need more security groups than currently available?
If you need additional security groups, please contact us for assistance.
Is there a confirmation step after editing a security group?
Yes, after making changes to a security group, you need to click Ok and then Save to confirm the edits.