WorkEasy Software integrates directly with QuickBooks Online to simplify employee management and payroll processing. This guide walks you through connecting QuickBooks Online, syncing employees, and mapping time codes so you can confidently send hours.
Prerequisites click the dropdown➡️
Before you begin, make sure your QuickBooks Online account is properly configured. The following are required:
General requirements
A QuickBooks Online plan (Essentials, Plus, or Advanced)
If using payroll features, a QuickBooks Online Payroll subscription (Core, Premium, or Elite)
Administrator access in both WorkEasy Software and QuickBooks Online
Account setup checklist
Active licenses and subscriptions
Payroll enabled in your QuickBooks Online account
Note: See Data flow and system of record below to understand how employee data is synced between QuickBooks and WorkEasy.
1. Confirm user access
Go to Gear > Manage Users.
Confirm that your user is listed as the Primary admin.
.png?sv=2022-11-02&spr=https&st=2026-02-02T20%3A20%3A29Z&se=2026-02-02T20%3A34%3A29Z&sr=c&sp=r&sig=GbmN2P6Hk0FlmBxa4GvD2kzIG1h8g1zlx3OAY67uCVs%3D)
.png?sv=2022-11-02&spr=https&st=2026-02-02T20%3A20%3A29Z&se=2026-02-02T20%3A34%3A29Z&sr=c&sp=r&sig=GbmN2P6Hk0FlmBxa4GvD2kzIG1h8g1zlx3OAY67uCVs%3D)
2. Check time settings
Navigate to Gear > Account & Settings > Time.
Ensure Show Service Field is On and Allow time to be billable is Off unless you use that field.
.png?sv=2022-11-02&spr=https&st=2026-02-02T20%3A20%3A29Z&se=2026-02-02T20%3A34%3A29Z&sr=c&sp=r&sig=GbmN2P6Hk0FlmBxa4GvD2kzIG1h8g1zlx3OAY67uCVs%3D)
.png?sv=2022-11-02&spr=https&st=2026-02-02T20%3A20%3A29Z&se=2026-02-02T20%3A34%3A29Z&sr=c&sp=r&sig=GbmN2P6Hk0FlmBxa4GvD2kzIG1h8g1zlx3OAY67uCVs%3D)
3. Adjust advanced settings
Go to Gear > Account & Settings > Advanced.
Turn off any unused tracking options:
Track Classes
Track Location
Track Projects
4. Verify employee pay configuration
In the left nav, select Payroll > Employees.
Choose an employee record.
Scroll to Base pay > Additional pay types.
Confirm each employee has a base pay rate and any required additional pay types.
.png?sv=2022-11-02&spr=https&st=2026-02-02T20%3A20%3A29Z&se=2026-02-02T20%3A34%3A29Z&sr=c&sp=r&sig=GbmN2P6Hk0FlmBxa4GvD2kzIG1h8g1zlx3OAY67uCVs%3D)
.png?sv=2022-11-02&spr=https&st=2026-02-02T20%3A20%3A29Z&se=2026-02-02T20%3A34%3A29Z&sr=c&sp=r&sig=GbmN2P6Hk0FlmBxa4GvD2kzIG1h8g1zlx3OAY67uCVs%3D)
.png?sv=2022-11-02&spr=https&st=2026-02-02T20%3A20%3A29Z&se=2026-02-02T20%3A34%3A29Z&sr=c&sp=r&sig=GbmN2P6Hk0FlmBxa4GvD2kzIG1h8g1zlx3OAY67uCVs%3D)
Setup Instructions click the dropdown➡️
Step 1: Connect your QuickBooks Online account
Go to Settings > Integration > QuickBooks Online > App Overview.
Click Add Company.
.png?sv=2022-11-02&spr=https&st=2026-02-02T20%3A20%3A29Z&se=2026-02-02T20%3A34%3A29Z&sr=c&sp=r&sig=GbmN2P6Hk0FlmBxa4GvD2kzIG1h8g1zlx3OAY67uCVs%3D)
Click Add Company > Connect to QuickBooks.
.png?sv=2022-11-02&spr=https&st=2026-02-02T20%3A20%3A29Z&se=2026-02-02T20%3A34%3A29Z&sr=c&sp=r&sig=GbmN2P6Hk0FlmBxa4GvD2kzIG1h8g1zlx3OAY67uCVs%3D)
Sign in with your QuickBooks credentials and follow the prompts.
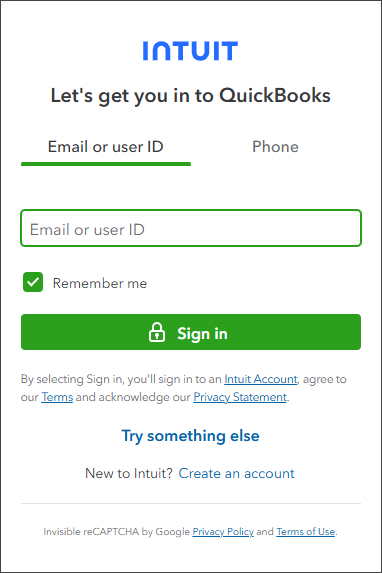
Click Connect.
.png?sv=2022-11-02&spr=https&st=2026-02-02T20%3A20%3A29Z&se=2026-02-02T20%3A34%3A29Z&sr=c&sp=r&sig=GbmN2P6Hk0FlmBxa4GvD2kzIG1h8g1zlx3OAY67uCVs%3D)
From the list of connected accounts, click Complete Setup.
.png?sv=2022-11-02&spr=https&st=2026-02-02T20%3A20%3A29Z&se=2026-02-02T20%3A34%3A29Z&sr=c&sp=r&sig=GbmN2P6Hk0FlmBxa4GvD2kzIG1h8g1zlx3OAY67uCVs%3D)
Configure Employee Data Mapping and Service Items by following the prompts to map employees and assign service items.
Click Save.
The QuickBooks Service Items start with EWF.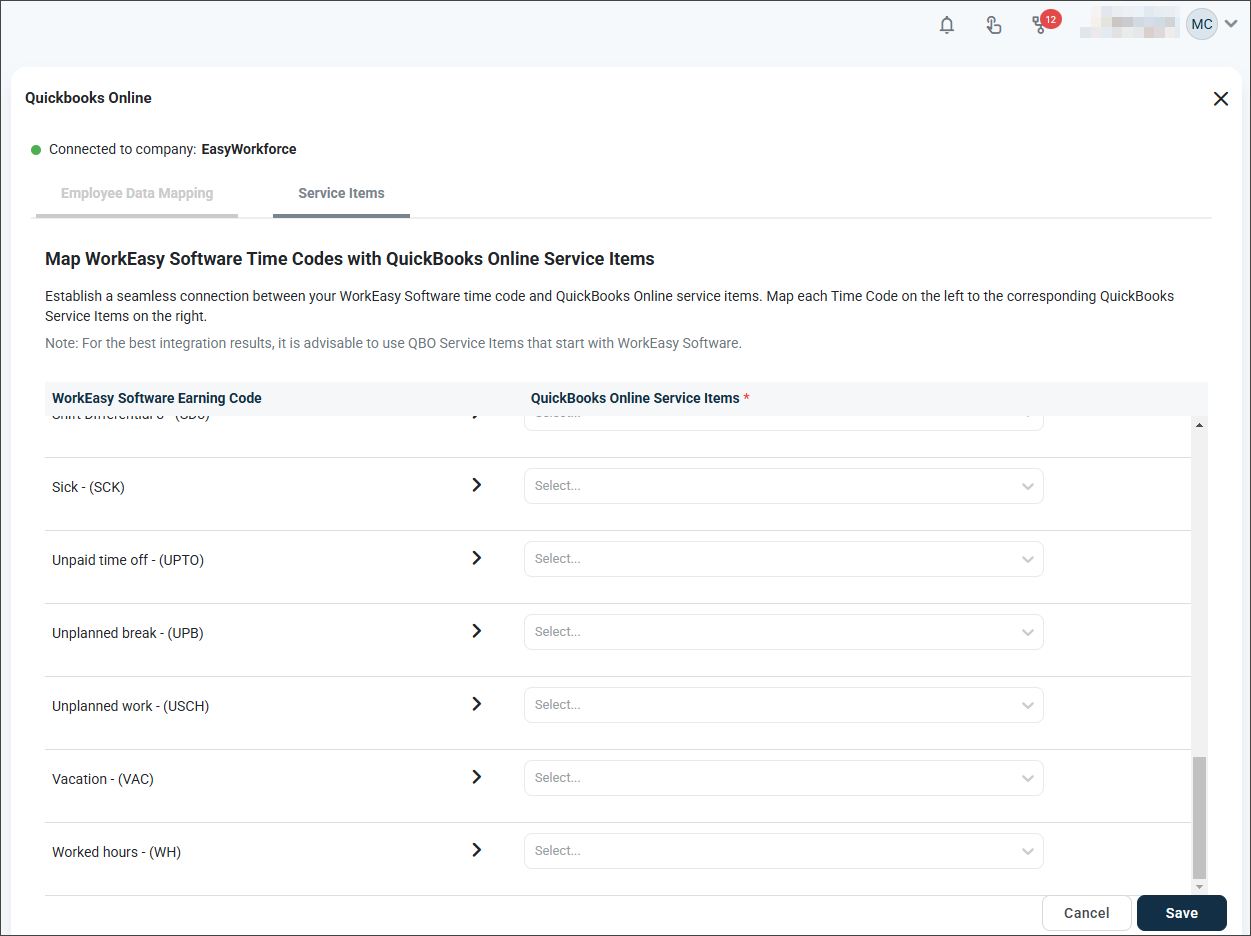
Step 2: Complete the initial setup
Once connected, you’ll be prompted to complete two essential setup steps:
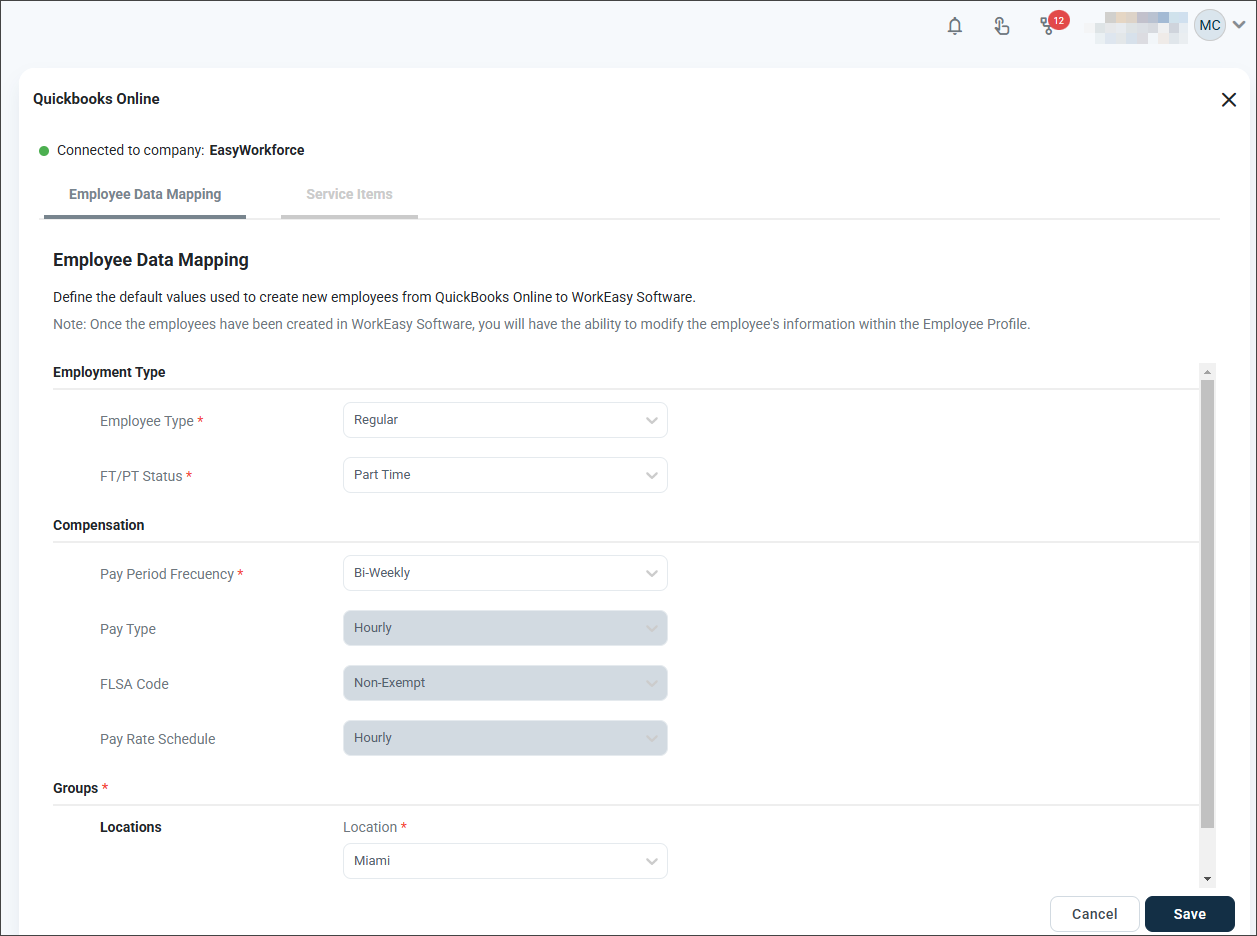
2.1 Employee data mapping
Define default values for employees imported from QuickBooks:
Employment type: Regular, full-time (recommended)
Pay period: Select the appropriate schedule, for example, biweekly
Location/Group: Choose the applicable default if configured
Tip: These settings apply only during the initial sync. You can later adjust employee profiles individually in WorkEasy.
Match WorkEasy time codes to QuickBooks service items:
WorkEasy Code | Suggested QuickBooks Item |
|---|---|
Worked hours | Regular |
Overtime | Overtime |
Vacation | Vacation |
Sick | Sick |
Holiday | Holiday |
Use the dropdowns to link each time code to its equivalent, then click Save to complete the setup.
Step 3: Sync employees
In the Synchronize tab, you can:
Link existing employees between QuickBooks and WorkEasy.
Create new employees in WorkEasy based on QuickBooks records.
You can also use bulk options to:
Automatically match employees by ID.
Select all as new to quickly import multiple users.
Once selections are made, click Save and Sync.
Important!
When adding new hires in QuickBooks Online, ensure that you manually sync employees in WorkEasy to update with the latest data. New hires entered in QuickBooks Online do not sync automatically.
If any employee is missing an ID or hire date in QuickBooks Online, those fields must be filled in before syncing.
Data flow and system of record
At this time, QuickBooks Online is the system of record. When you sync employees, QuickBooks data overrides any employee information stored in WorkEasy. If QuickBooks is missing a value, the corresponding field in WorkEasy is still overwritten, including personal information fields.
The integration currently pulls these employee fields from QuickBooks:
First, middle, and last name
Employee ID
Preferred name (Display name)
Hire date
Date of birth
Gender
SSN (planned for a future enhancement)
Address (planned for a future enhancement)
Recommendation: Because WorkEasy is not the system of record in this setup, maintain and update all employee information, including personal and employment details, directly in QuickBooks. Use WorkEasy to sync and process time.
Step 4: Send hours to QuickBooks Online
Go to Timesheets in WorkEasy.
Select the appropriate pay period.
Use the dropdown to choose Send Hours to QuickBooks Online.
If connected to multiple accounts, select the correct one.
Click Send.
.png?sv=2022-11-02&spr=https&st=2026-02-02T20%3A20%3A29Z&se=2026-02-02T20%3A34%3A29Z&sr=c&sp=r&sig=GbmN2P6Hk0FlmBxa4GvD2kzIG1h8g1zlx3OAY67uCVs%3D)
.png?sv=2022-11-02&spr=https&st=2026-02-02T20%3A20%3A29Z&se=2026-02-02T20%3A34%3A29Z&sr=c&sp=r&sig=GbmN2P6Hk0FlmBxa4GvD2kzIG1h8g1zlx3OAY67uCVs%3D)
Step 5: Assign pay items in QuickBooks Online (one-time setup)
In QuickBooks Online:
Go to Weekly Timesheets.
Review the synced time entries.
If the Select Pay Item dropdown is missing:
Confirm the employee is enabled for payroll.
Ensure pay rates and items are configured.
Use the dropdowns to assign pay items (e.g., Regular, Overtime).
Click Save.
.png?sv=2022-11-02&spr=https&st=2026-02-02T20%3A20%3A29Z&se=2026-02-02T20%3A34%3A29Z&sr=c&sp=r&sig=GbmN2P6Hk0FlmBxa4GvD2kzIG1h8g1zlx3OAY67uCVs%3D)
Tip: Once pay items are mapped, go back to WorkEasy > Integration > QuickBooks Online > Synchronize > Sync Pay Items to link the service items to the assigned pay items. This allows the system to remember your choices for future timesheets.
You're all set!
Going forward, WorkEasy will automatically match and send your employee hours to the correct QuickBooks pay items. No manual entry needed. This integration helps ensure payroll accuracy and reduces duplicate work.
Troubleshooting tips
Clear your browser cache if recent changes do not appear correctly.
Verify that all time codes are accurately mapped to the corresponding items.
For Admins
You can now bulk-sync employees using these options:
Set all as new employees: Adds all listed employees as new entries.
Find match by Employee ID: Matches employees based on their Employee ID.
Important:
Selecting Set all as new employees will override manually linked employees not previously synced.
Users with PIN-based logins should review keypad settings if multiple QuickBooks Online accounts are connected.
Need help?
If you have any questions or run into setup issues, our Support Team is happy to assist. Just submit a ticket or email us directly at support@workeasysoftware.com.