Adding a Time Clock Device
To connect a time clock device to the cloud, first add it to the WorkEasy Software system. This step links the time clock to the cloud platform. Once integrated, you can manage time-tracking operations seamlessly, with real-time data synchronization for accurate time entries. This integration also provides access to features that enhance time management efficiency. Properly adding the time clock to WorkEasy Software is essential for smooth operations.
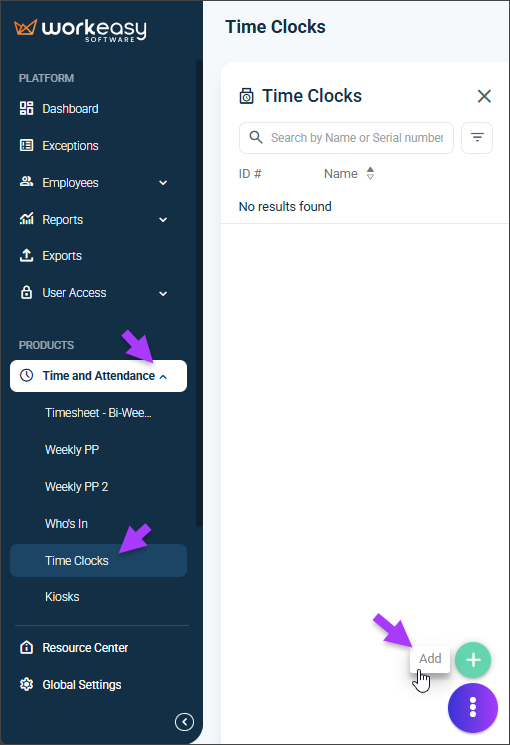
In the left navigation panel, go to Time and Attendance > Time Clocks.
Click the ellipsis (⋮) > Add.
Enter the device details and click Save to register the device. To update the device later, click the ellipsis (⋮) > Edit, make your changes, and click Save.
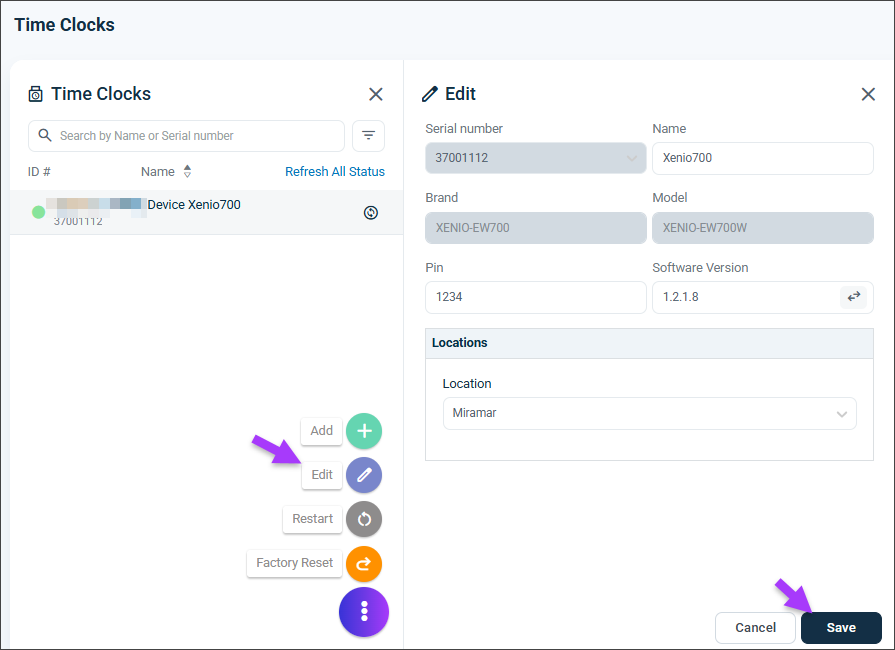
Device Details
Field | Description |
|---|---|
Serial Number | Select from the drop-down menu. |
Name | Appears in certain reports and features. |
Brand | Populated automatically. |
Model | Populated automatically. |
PIN | Used to access the clock’s menu. |
Software Version | Automatically populated with the current version on the device. |
Location | Determines the device’s time zone. |
Setting Up a Time Clock Device
Tap Get Started to begin.
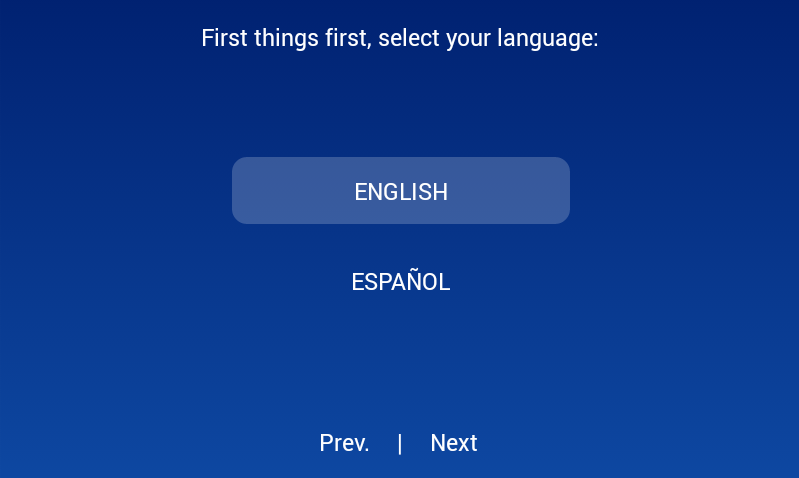
Select your language and tap Next.
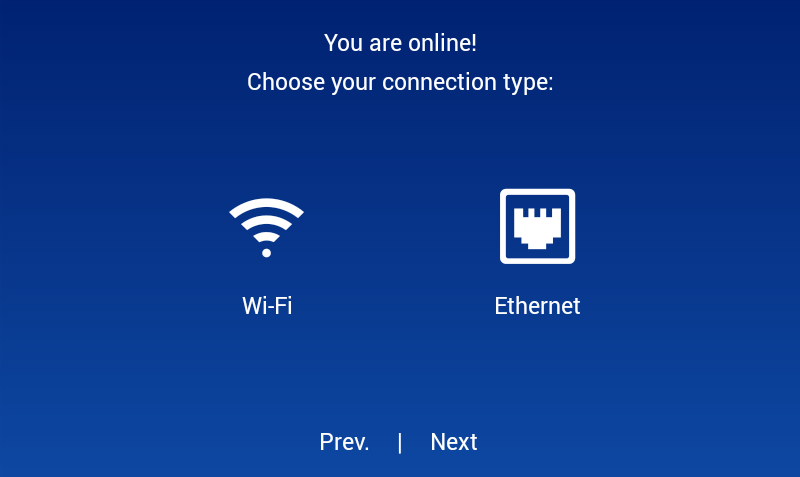
Select Wi-Fi or Ethernet as the connection type and tap Next.
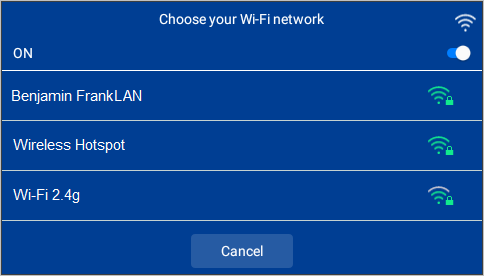
Setting Up Wi-Fi
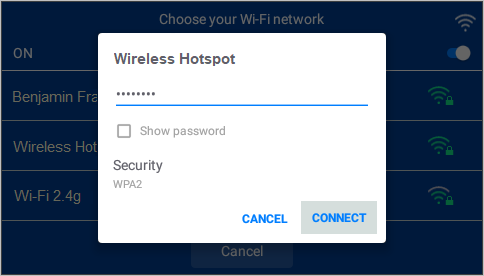
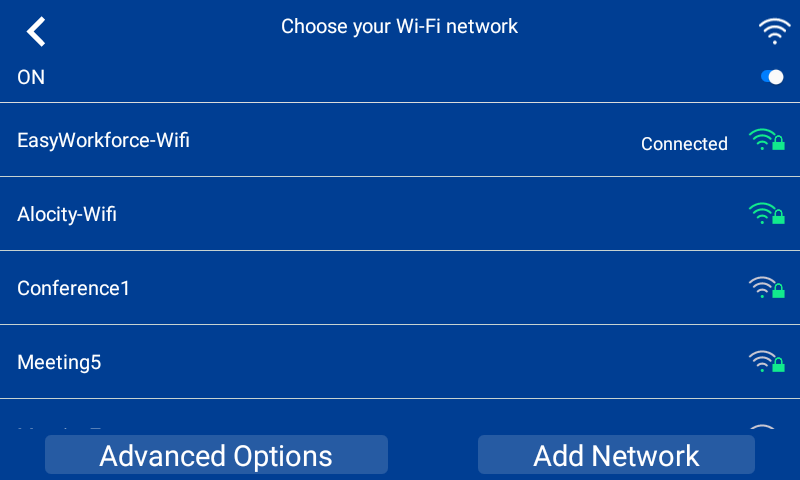
Select your Wi-Fi network from the list, enter the password, and tap Connect.
- If you are unsure of which network to select, contact your local IT or internet service provider.
- If the status displays Connecting for an extended period of time, please re-enter the password.When the status displays Connected, tap Cancel to return to the connection type screen.
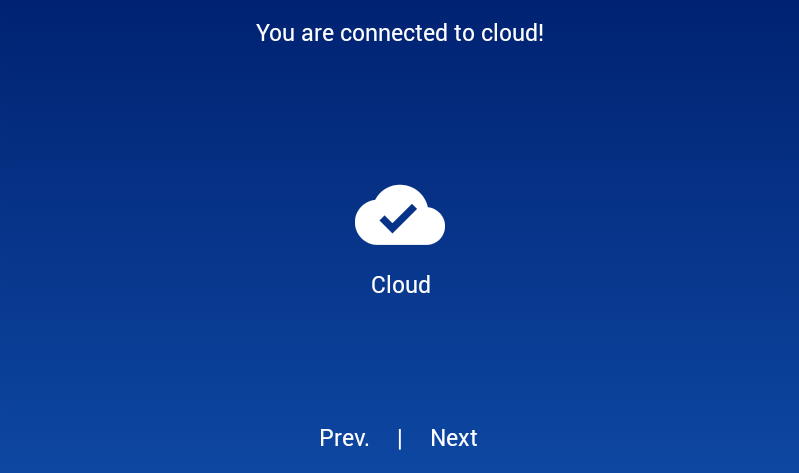
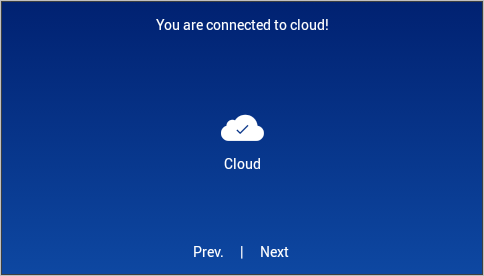
You should now see You are online! at the top of the screen. Tap Next.

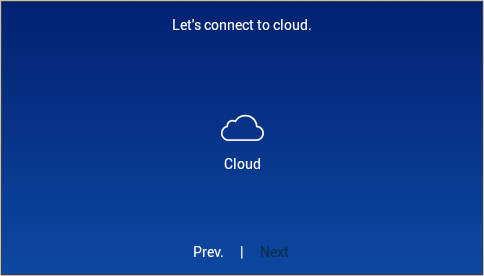
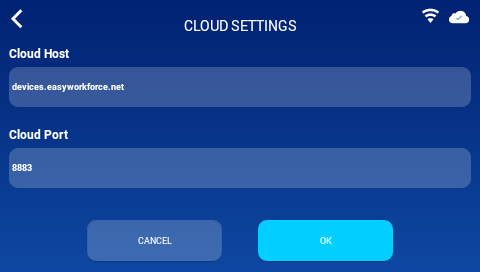
Tap Cloud.
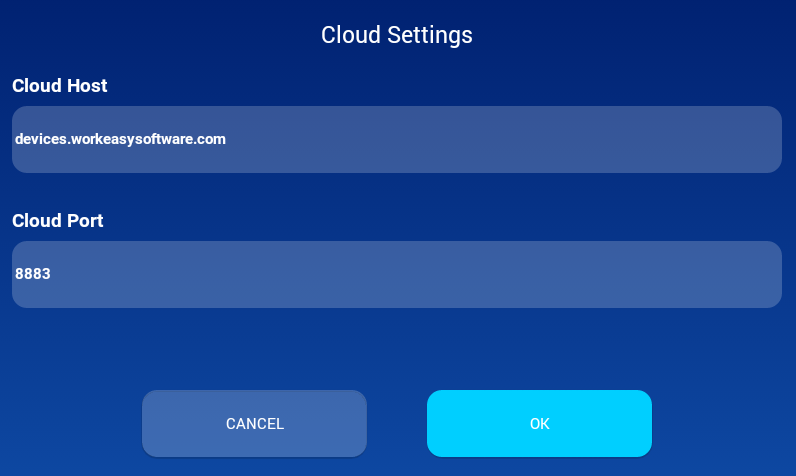
Tap OK.
Tap Next.
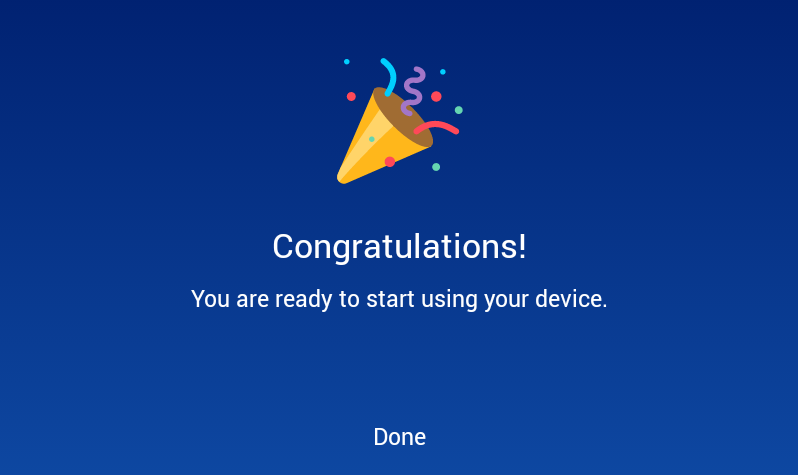
Tap Done.
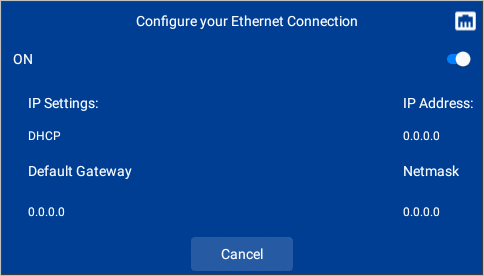
Setting Up Ethernet
Plug an Ethernet cable into the device (next to the power adapter) and .
Wait for the device to display an IP address.
If it shows 0.0.0.0, go to the Connection Type screen, select Wi-Fi, and turn Wi-Fi off.
-gif.gif)
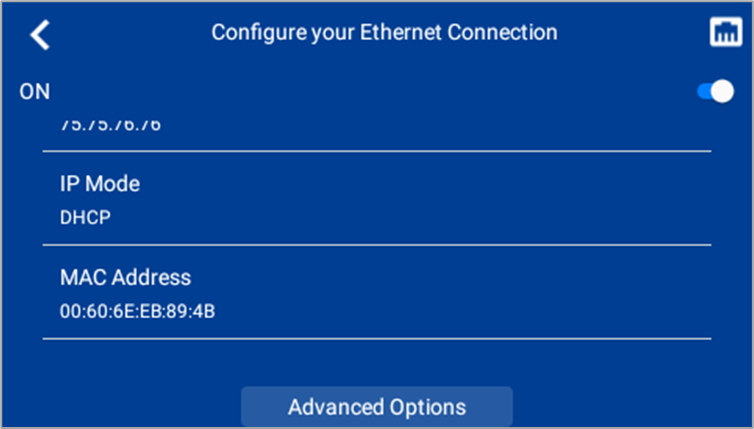
To set a Static IP, scroll down to the bottom and tap Advanced Options.
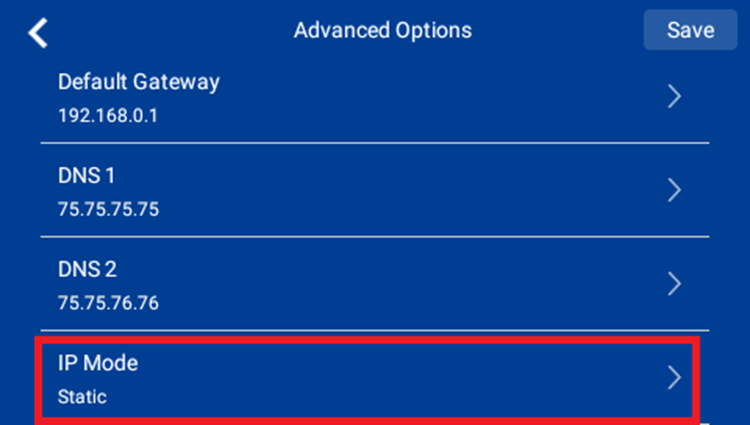
Ensure IP Mode is set to Static.
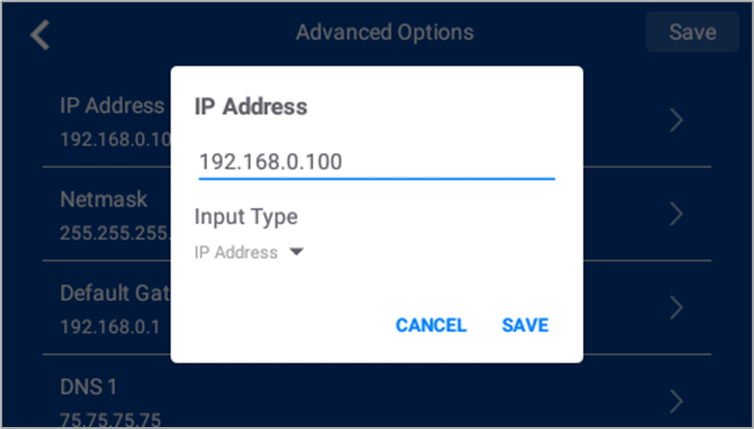
Tap the IP Address field, enter an IP, and tap Save.
Once a valid IP Address is displayed, tap Cancel to return to the connection type screen.
You should now see You are online! at the top. Tap Next.
Tap Cloud.
If port 8883 does not work, try 443, depending on your company's network policy.

Tap OK.
Tap Next.
Tap Done to reach the Home screen.
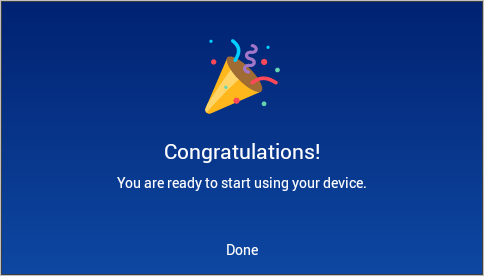
You're all set! 😊👍
If you have questions, please call us at (888)783-1493, email support@workeasysoftware.com, or submit a ticket.