
- Click Global Settings > Time and Attendance > Reporting Hours > Company, Group, or Employee.
- Company: Applies to the whole company
- Group: Applies to a group of employees (e.g., location or department)
- Employee: Applies individually to one or more employees
- Enter Rule Name.
- Select an Effective Start Date. This defines when the rule should go into effect.
- For Clock In/Out type, select User Selection or Quick Punch.
- User Selection: Users can select Clock In, Clock Out, and Start Break.
- Quick Punch: A break isn't assigned, and IN or OUT is automatically allocated.
- Select the Max Shift Length time and the Max Rest In A Shift time.
- For overnight employees, under Daily Hours Allocation, select the type of hours allocation: Leading Day, Where Hours Fall, Training Day, or Day With More Hours.
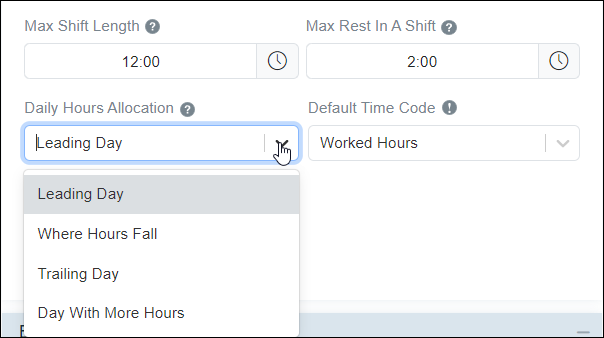
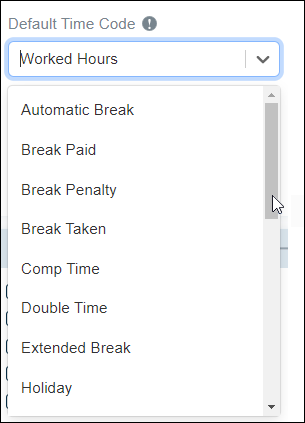
- Select an applicable option for Default Time Code.
- You can select if Employee Comments or Manager Notes are mandatory, but they are optional.

MOBILE APP
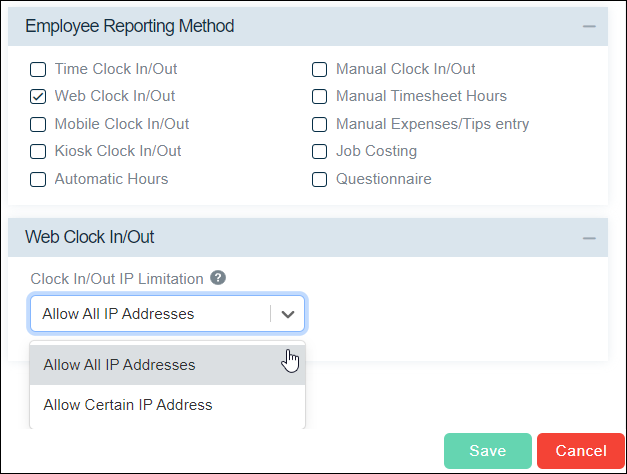
- Select the Mobile Clock In/Out checkbox.
- Click the + sign to expand the Mobile Clock In/Out options.

- Select Mobile Clock In/Out settings as applicable. (Refer to the table below for the descriptions of the different settings.
- Click Save.

| Setting | Description |
| Photo Required | Records a photo associated with the employee's clock in/out punch |
| Enable Geolocation |
Related: How to Add a Geofence |
| Restrict By Device (IMEI or ID) | Records the IMEI or ID of a device used to clock in/out. This is a unique address associated with the device. Once the IMEI or ID is recorded, it will be enforced by the system. |
| Allowed IMEI or ID (Optional) | Enter IMEI or IDs of mobile devices to restrict usage to those devices |
WEB
- Follow all the steps above until step 9.
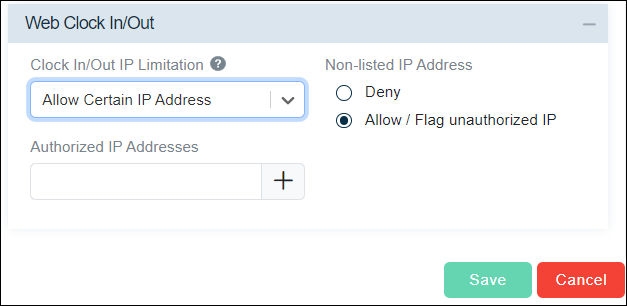
- Click the + sign Web Clock In/Out and select one of the two options for Clock In/Out IP Limitation.
- If you select Allow All IP Addresses, click Save.
- If you select Allow Certain IP Address, click the Deny radio button or the Allow/Flag unauthorized IP radio button for Non-listed IP Address.
- Enter the Authorized IP Addresses.
- Click Save.
You're done! 😀👍
IMPORTANT❗
Allowing and restricting IMEIs and IDs is done at the Employee level. Make sure to not restrict the whole Company to one mobile device.
If you have questions, please call us at (888) 783-1493, email support@workeasysoftware.com, or Submit a Ticket.