Accessories
1 wall mounting bracket
1 mounting plate
4 wall anchors
4 screws
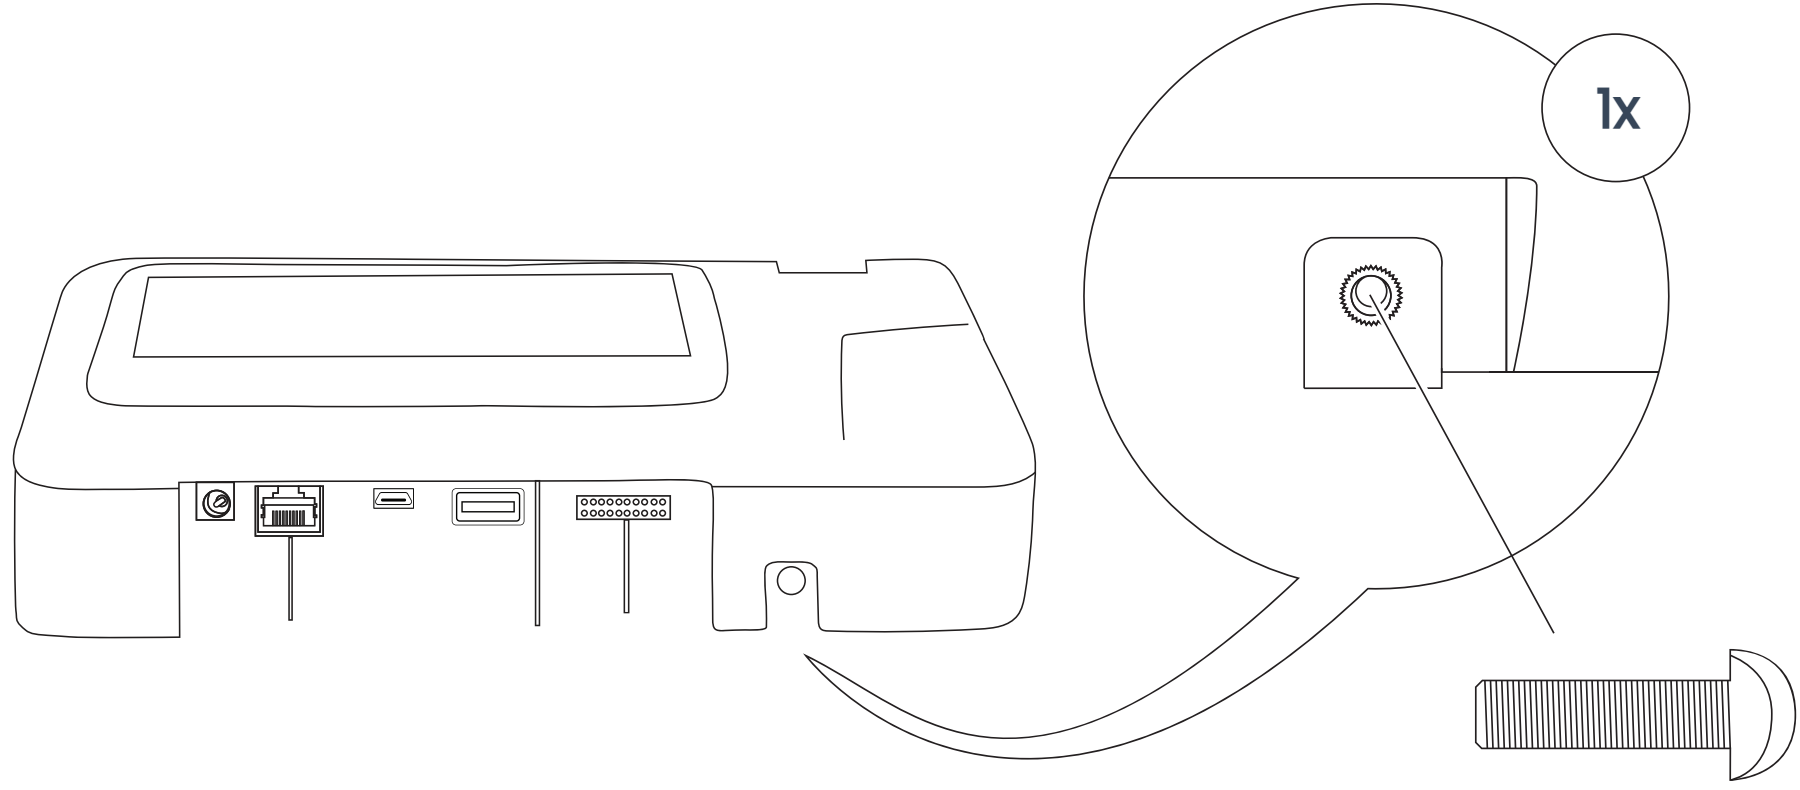
1 wall mount screw
Installation
Using a pencil, mark four screw holes on the wall.
Insert wall anchors into the four holes you marked.
Align the wall mount with the four wall anchors and secure the mount to the wall with the four screws provided.
When connecting to your network via Ethernet, run the cables (Ethernet cable not provided) inside or outside the wall.
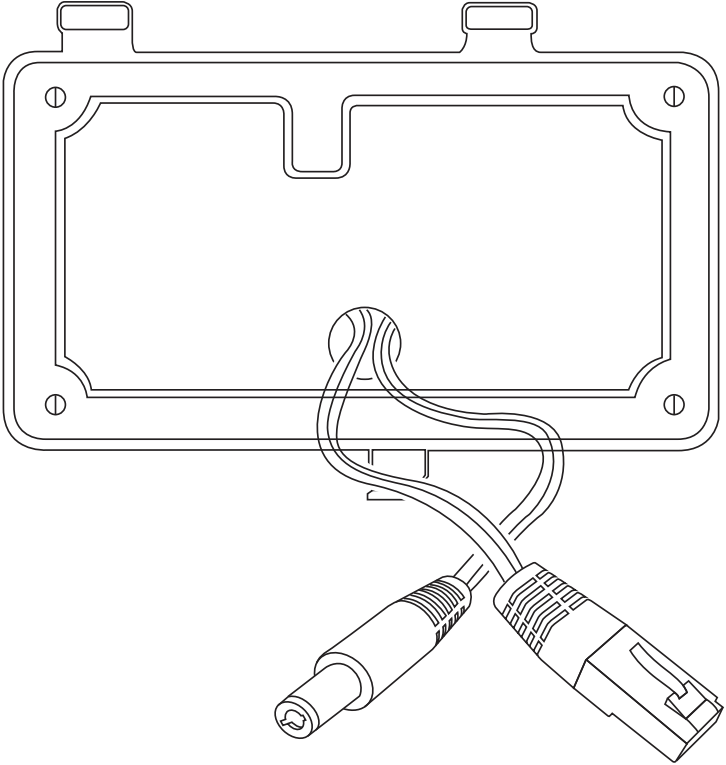
Connect your Ethernet cable to an Ethernet wall jack, router, or switch. Insert the Power Adapter into an electrical receptacle.
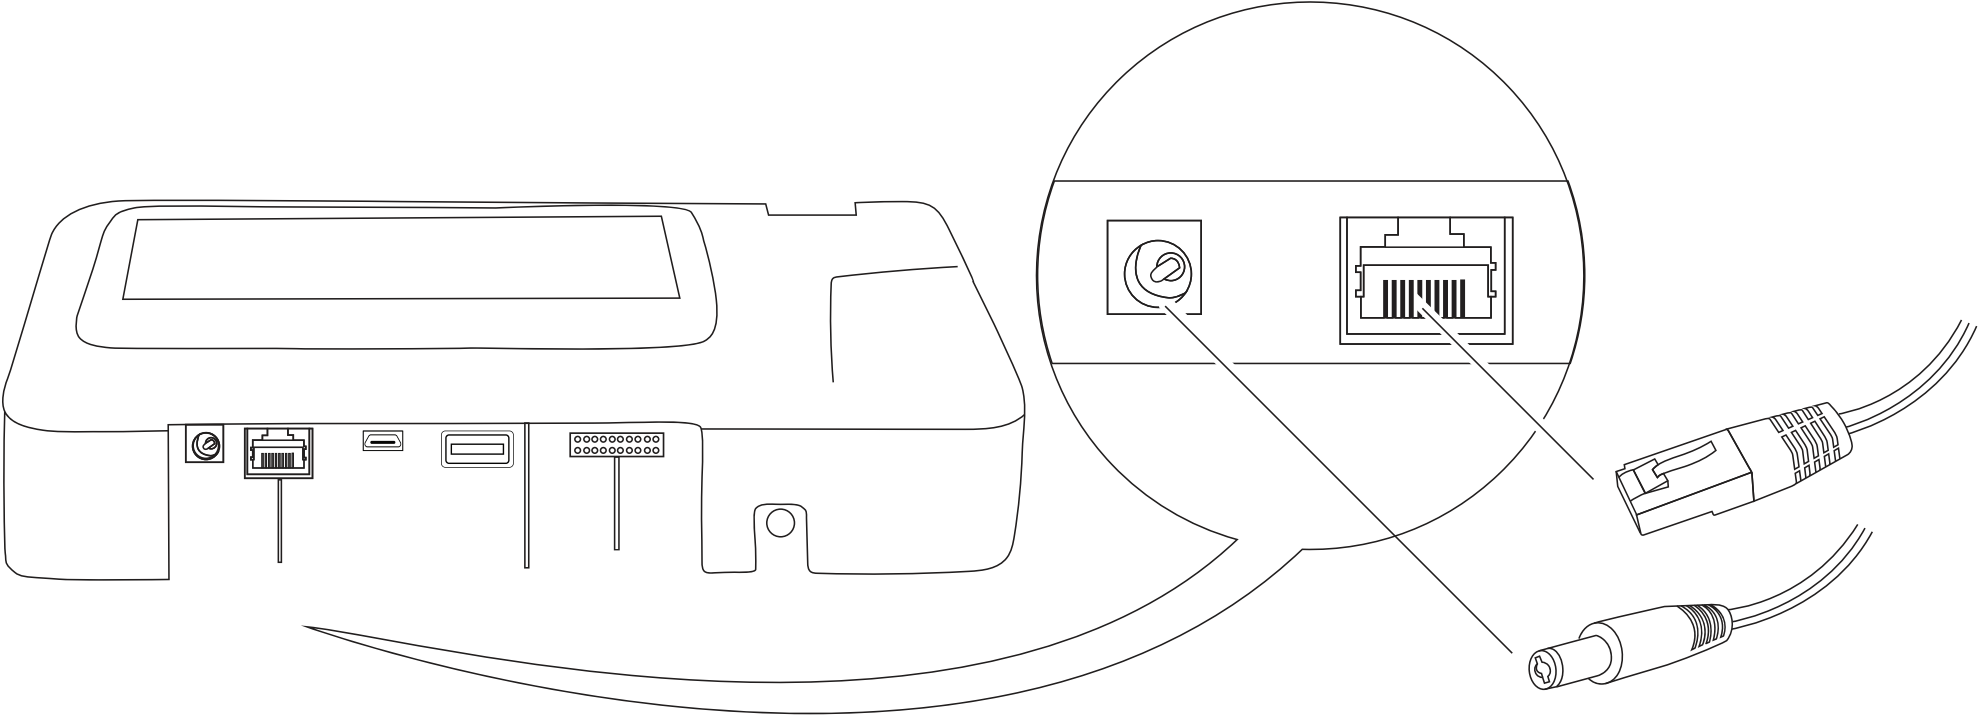
Attach the other end of the Ethernet cable and the power adapter to the Xenio.
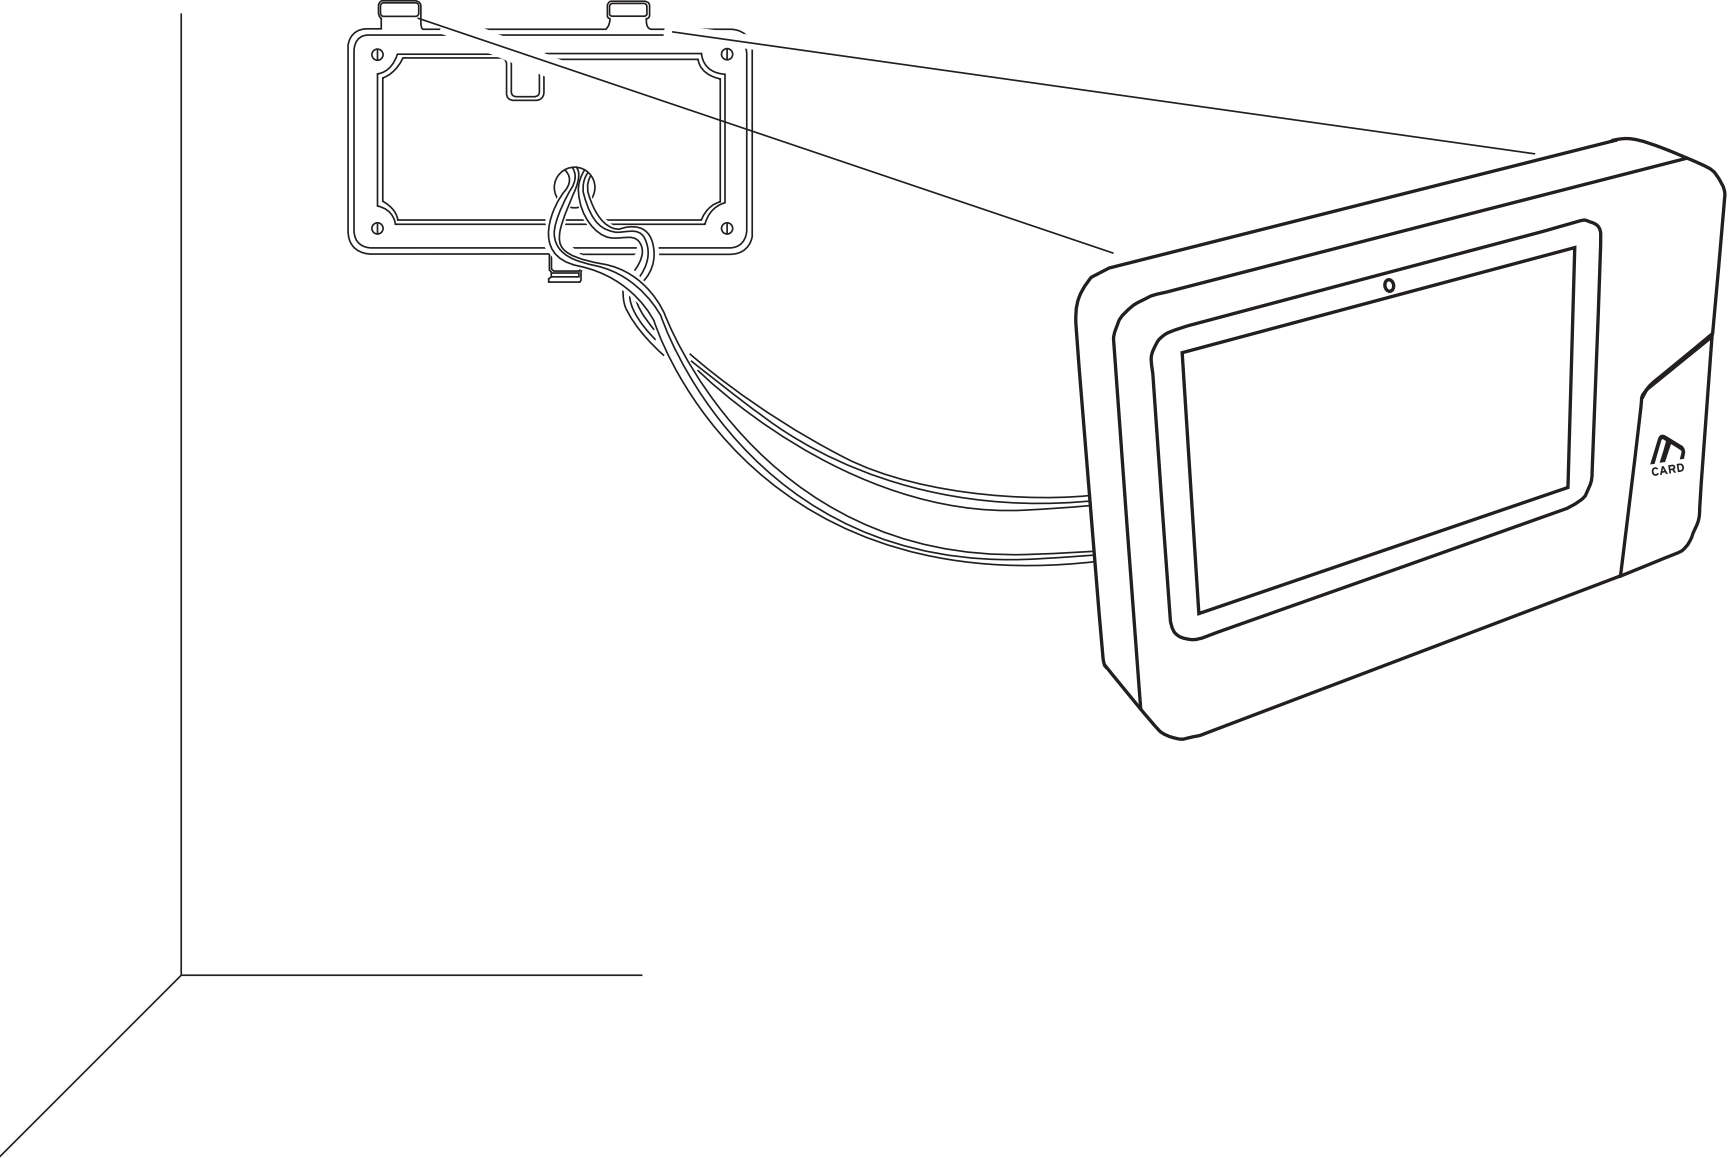
Attach the Xenio to the wall mount.
Insert the Cover Plate (Optional) into the grooves.
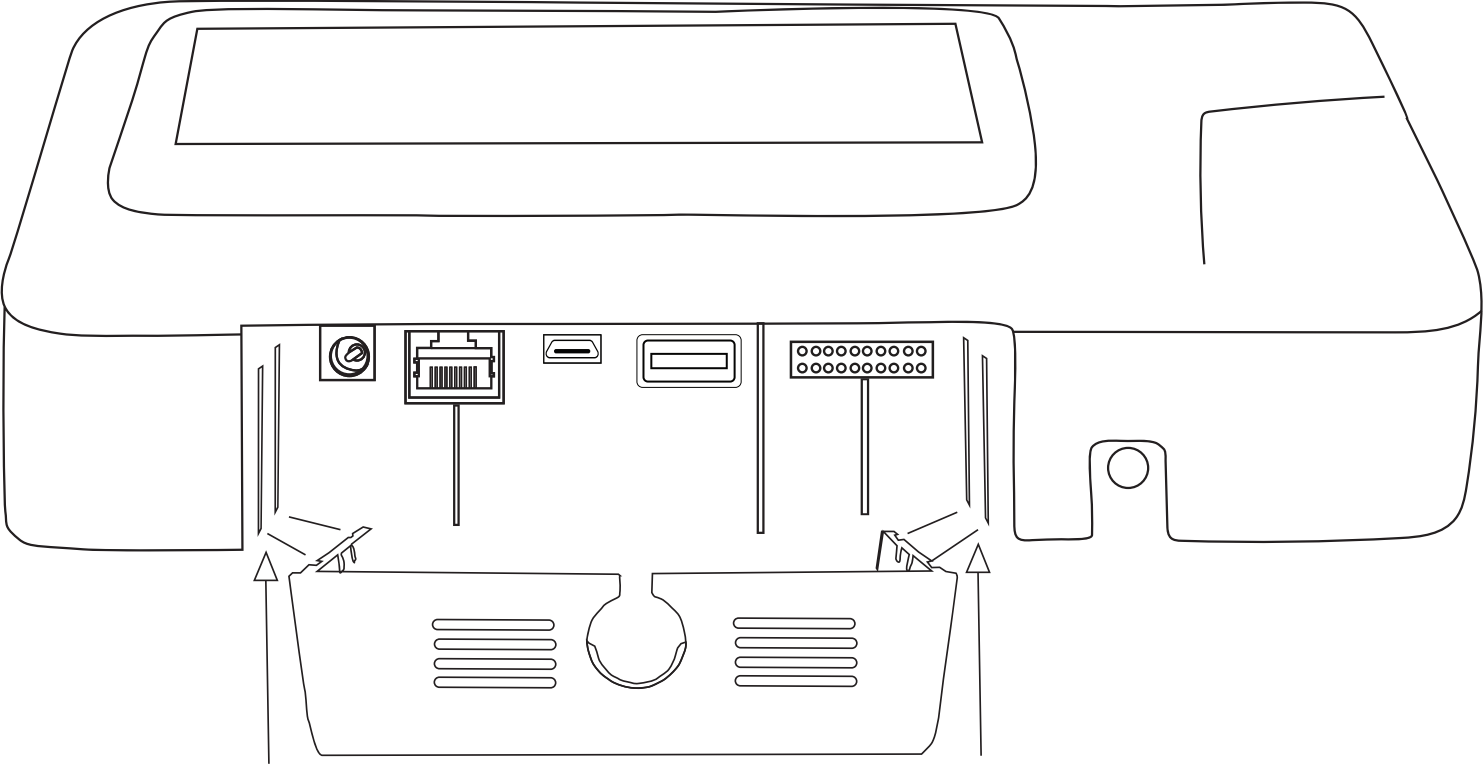
Secure the Xenio to the wall mount by fastening the wall mount screw (C).
Do not connect the provided power adapter when connecting power to the Xenio via POE (Power Over Ethernet).
Please follow these steps if applicable:
Add the time clock to the software
Facial Recognition Enrollment (Xenio Devices)