Define your company’s management hierarchy under Global Settings > Platform Settings > Management Levels.
.png?sv=2022-11-02&spr=https&st=2026-01-22T16%3A27%3A32Z&se=2026-01-22T16%3A38%3A32Z&sr=c&sp=r&sig=LSVS4egvl2CelJrZs1FCj8RQ0VVyp7SrLlzTuVG50k8%3D)
Example roles: Administrator, Regional Manager, Manager, Supervisor.
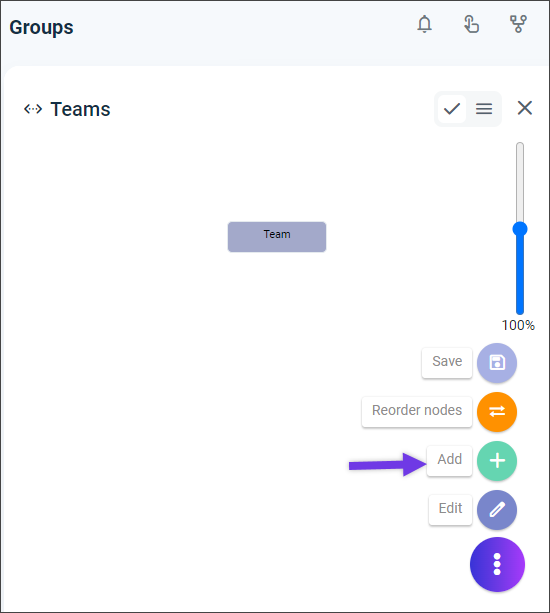
Use the ellipsis menu to add subordinate levels.
Enable Allow multiple managers if the role will be shared.
.png?sv=2022-11-02&spr=https&st=2026-01-22T16%3A27%3A32Z&se=2026-01-22T16%3A38%3A32Z&sr=c&sp=r&sig=LSVS4egvl2CelJrZs1FCj8RQ0VVyp7SrLlzTuVG50k8%3D)
Create and configure group structures under Global Settings > Platform Settings > Group Structure.
Add group types like Location, Department, Position, or custom types.
Define if the group type is managed and assign a target (employees or devices).
Set up hierarchies up to five levels deep.
.png?sv=2022-11-02&spr=https&st=2026-01-22T16%3A27%3A32Z&se=2026-01-22T16%3A38%3A32Z&sr=c&sp=r&sig=LSVS4egvl2CelJrZs1FCj8RQ0VVyp7SrLlzTuVG50k8%3D)
Assign managers using Employees > Manager Assignments.
.png?sv=2022-11-02&spr=https&st=2026-01-22T16%3A27%3A32Z&se=2026-01-22T16%3A38%3A32Z&sr=c&sp=r&sig=LSVS4egvl2CelJrZs1FCj8RQ0VVyp7SrLlzTuVG50k8%3D)
Use group assignments to control visibility and access.
Limit role access (e.g., Payroll Manager, Schedule Manager).
Filter employees in timesheets, schedules, and reports.
Configure alerts for managers via Global Settings > Time Tracking > Alerts.
Choose an alert type (e.g., Forgot to clock in), click Edit if you wish to change the settings, OR
Click the three dots > Add to add a new alert.
Set Audience to Manager.
Define Alert Rules and recurrence.
Set the Scope by Groups or Custom Fields.
Under Who to notify, select Manager.
Click Save.
.png?sv=2022-11-02&spr=https&st=2026-01-22T16%3A27%3A32Z&se=2026-01-22T16%3A38%3A32Z&sr=c&sp=r&sig=LSVS4egvl2CelJrZs1FCj8RQ0VVyp7SrLlzTuVG50k8%3D)
Use management levels in approval workflows via Global Settings > Platform Settings > Workflows.
.png?sv=2022-11-02&spr=https&st=2026-01-22T16%3A27%3A32Z&se=2026-01-22T16%3A38%3A32Z&sr=c&sp=r&sig=LSVS4egvl2CelJrZs1FCj8RQ0VVyp7SrLlzTuVG50k8%3D)
.png?sv=2022-11-02&spr=https&st=2026-01-22T16%3A27%3A32Z&se=2026-01-22T16%3A38%3A32Z&sr=c&sp=r&sig=LSVS4egvl2CelJrZs1FCj8RQ0VVyp7SrLlzTuVG50k8%3D)
.png?sv=2022-11-02&spr=https&st=2026-01-22T16%3A27%3A32Z&se=2026-01-22T16%3A38%3A32Z&sr=c&sp=r&sig=LSVS4egvl2CelJrZs1FCj8RQ0VVyp7SrLlzTuVG50k8%3D)
Add a hierarchy (sub-levels)
Once you have created the parent, you can add a hierarchy up to five levels deep.
To do so, select the parent (e.g., Team) and click Add.

If you need help, call (888) 783-1493, email support@workeasysoftware.com, or submit a ticket.