- Knowledge Base
- Schedules
- Scheduling Application
-
Latest Release Notes
-
Getting Started
-
My Portal
-
Time & Attendance Configurations
-
Timesheets
-
Schedule Configurations
-
Schedules
-
Human Resources
-
Time Off Configurations
-
Time Off
-
Reports/Exports
-
Employee Management
-
Integrations
-
Platform Configurations
-
Time Clocks & Kiosk
-
Mobile App
-
Job Costing
-
Dashboard
-
Pay Period
-
Left Nav
-
Groups
-
Notification Preferences
-
Time and Attendance
-
New Left Nav & Global Settings
-
User Access
How to Copy Shifts
How to use the Copy function in the Scheduler or Shift Planner to apply shifts to the following week
Before Shifts can be Copied, they must be added. To learn how to add Shifts, see: How to Add Shifts to the Scheduler
The Copy Function is available in the 7 & 14-day views.

|
1. Once you've added baseline Shifts: Click |
 |
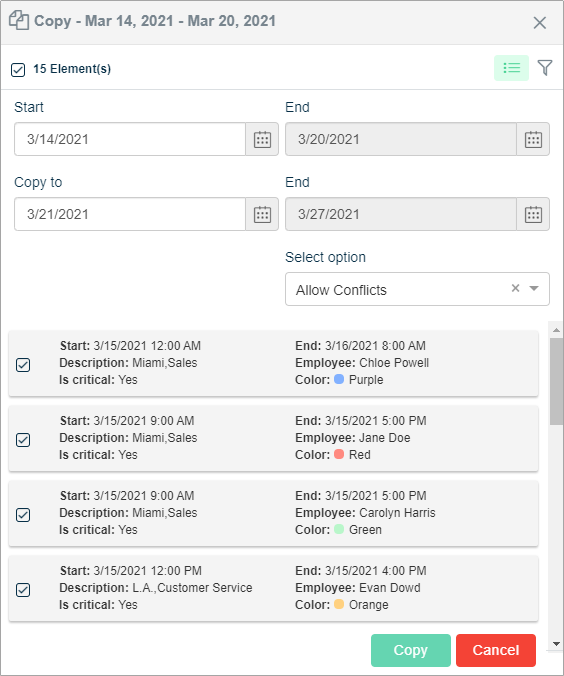
2. Make the necessary selections and click 

| Setting | Description |
| Element(s) |
Number of selected elements (unpublished Shifts) to be copied over the specified duration. * Use the checkbox to unselect/select elements |
| Start | Start of the selected 7-day date range in the Scheduler |
| End | End of the selected 7-day date range in the Scheduler |
| Copy to | First day of the following week selected |
| End | Last day of the following week selected |
| Select Option | When Copying the Shift(s) to the following week, the software checks that week for overlapping Shifts. An overlapping Shift occurs when 2 Shifts are assigned to the same day at the same time. The following options dictate the outcome when an overlapping shift is detected.
|
* Shifts copied to the following weeks are saved, but not published.
3. Click ![]() and select Publish
and select Publish ![]() to assign the shifts to employees.
to assign the shifts to employees.

