
-
Latest Release Notes
-
Getting Started
-
My Portal
-
Time & Attendance Configurations
-
Timesheets
-
Schedule Configurations
-
Schedules
-
Human Resources
-
Time Off Configurations
-
Time Off
-
Reports/Exports
-
Employee Management
-
Integrations
-
Platform Configurations
-
Time Clocks & Kiosk
-
Mobile App
-
Job Costing
-
Dashboard
-
Pay Period
-
Left Nav
-
Groups
-
Notification Preferences
-
Time and Attendance
-
New Left Nav & Global Settings
-
User Access
How to Import Jobs
How to use the Import Tool to import Jobs via CSV file
The Job Costing Initial Setup must be completed before Jobs can be imported.
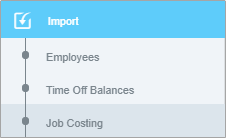
1. Click ![]() Import in the Left Nav to expand the options and select Job Costing.
Import in the Left Nav to expand the options and select Job Costing.
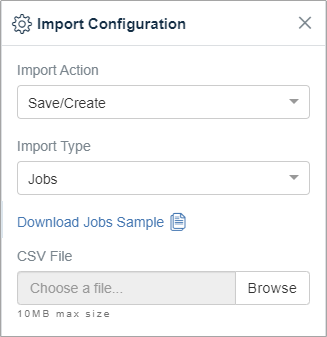
2. Select an Import Action:
- Save/Create - Add new Jobs
- Only Update - Updates previously added Jobs
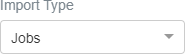
3. Select Jobs from the drop-down list.
4. Click  in the software to download the sample file.
5. Open the sample file from the browser or from the Downloads folder. Spreadsheet software such as Excel or Libre Office Calc is required for the following steps:


6. Enter the Job data into the fields. The Required Fields must be filled to continue.
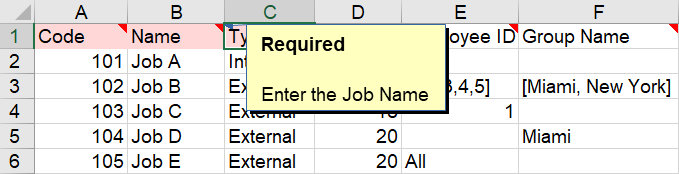
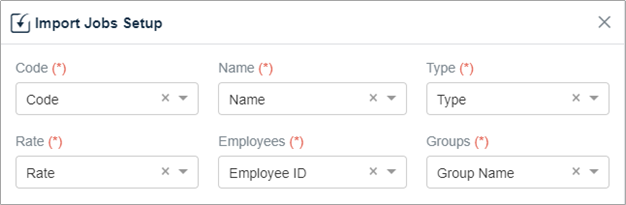
Job Costing Fields
| Field | Description |
| Code |
Job Code assigned to the Job. |
| Name | Name of the Job |
| Type |
Internal - Jobs used for standard business External - Jobs used for client projects |
| Rate | Pay rate assigned to the Job Costing Configuration |
| Employee ID |
Employee ID assigned to the Job * If "All" is entered, all employees in the "Group Name" Group will be assigned the Job. |
| Group Name | Group assigned to the Job |
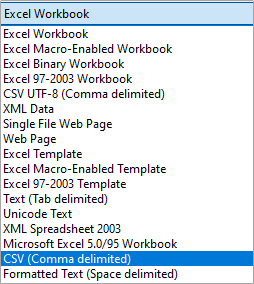
7. Once you are finished entering the Job data, save the file as a CSV.
Excel: Libre Office Calc:

8. Click Browse, select the CSV file, and open it.

9. Click  to import the CSV file.
10. The software will detect fields from the uploaded file.
Make sure the heading names match the respective fields and click

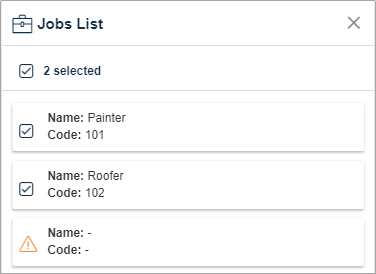
11. Select the identified Jobs and click 
- If
 appears next to a Job with a name or code, click the Job to view the fields that contain errors.
- If no Name or Code appears next to the Job, there is no issue ✔️.
* The Jobs and related Job Costing Configurations will appear listed in the Job Costing Global Settings.
